|
|
|
Export Configuration
To export the pasUnity configuration right-click on System and select Export.... The file will be saved in XML format. Exported configurations can be used as a baseline of comparison should something go wrong later on. Only a full system administrator can export the system configuration.
Enhanced Security
With a valid support contract and/or subscription to pasPortal, advanced options are available to enable role-based security, Single Sign-On, web-based reporting, and special integrations with other pasUNITY and pasUNITY-partner branded products.
By default, no security mode is enabled. In this default mode all users of the pasUnity application, whether directly through the Windows-based user interface or via the web service interfaces, have the same access, visibility, and permissions to every object in the system - namely unrestricted. In this mode of operation, no logon forms will make themselves visible via the user interfaces of the Windows-based application user interface.
The four different security modes are detailed here.
To enable a security mode, you must navigate to the System node in navigation tree within the pasUnity user interface and specifically enable the functionality as follows:
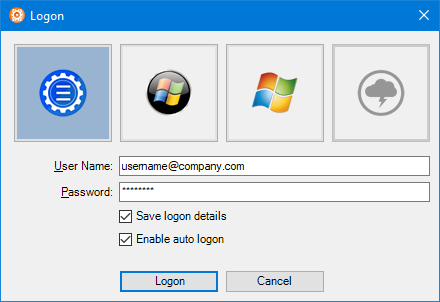
•Check the option for pasPortal Integrated Security Enabled to enable the user interface for security administration. This will trigger a dialog that requires you to logon to the pasPortal to retrieve roles. At this point you should logon using the account that you will be configuring for pasUnity services and not a personal account. Enter the logon information as shown and press Logon to connect.
•From the System Configuration tab you will need to provide the following information:
•Service User Name: pasPortal user account that the pasUnity application will use to communicate with the pasPortal hosted application framework. This is likely to be the same user name and password used in the previous step. This account is used to enumerate roles used to secure application components so that security may be graphically defined and administered.
•Service Password: The password for the service user name. To confirm your entry, press Validate Credentials.
•Matrix Service Callback URL: An optional address used to communicate back to the pasPortal infrastructure for tasks such as mapping omission reporting. Example: http://me.pasportal.com:9080/pasUnity/2012a/MatrixService/Federated. NOTE: To auto-generate this value you can double-click the Matrix Service Callback URL label.
•Upon successfully validating the configuration credential move to the Permissions tab. Click anywhere inside any of the white boxes to retrieve the initial configuration. Now use the interface to assign Full control to a role that contains the configuration credentials account. Permissions assigned in the System Configuration Permissions will apply to the entire system. Permissions can also be assigned at the more specific Agent, Job, Impeller, Account, and Matrix levels. The Permissions tab will only be visible if pasPortal Integrated Security is enabled during System Configuration. For a detailed list of the available permission types available at this level refer to the Permissions topic.
•The Components tab has features used to upgrade system components and remove legacy features after the upgrade process is complete. Version 4.25.0.0 introduced data file compression within the database itself for all newly added files. To upgrade existing files to use compression click the Component Update button.
•Key Value Pairs tab:
•The Key Value Pairs tab is storage for values associates with key names unique at the object and level where they are defined and allow for value persistence between job executions.
•Key: The unique key name used to locate and/or manipulate values on the object scope where they are defined. For example, a job can only have one key/value pair with the name Counter but the same name could be used on other jobs or on impeller of the same job for instance. Key names are not case sensitive. Key names are limited to 256 characters in length. Key names cannot be changed once created without adding a new key/value pair and deleting the old value.
•Value: The value associated with the unique Key. The value has no maximum length. You can store macro expressions in the key/value pairs but you will still need to parse them.
•Refresh: Will refresh the display with the latest values from the database (also F5 can be used).
•Add: Allows you to provide the Key portion of a new key/value pair which will be added to the database with a blank value.
•Delete: Allows you to remove a key/value pair from the database.
•When finished press Update to save the system configuration changes. From this point forward only authenticated users will be able to use the user interface or call into the web services.
Copyright © 2025 pasUNITY, Inc.
Send comments on this topic.